How to Create a Page in WordPress: The Complete 2026 Guide
How to Create a Page in WordPress ?
It’s still a vivid memory of when I built my first website. I’d logged in, stood gazing at the WordPress dashboard for about ten minutes, and decided: just where in the hell am I supposed to click to “make” an “About” page? If this is the type of slightly overwhelmed feeling you currently have, take a deep breath – there’s a LOT of us who ask this.
And while we learn that building page in WordPress takes approximately 5 minutes once we locate the “Add New Page” button… If you ask what many tutorials leave out is a) how to make an About page look decent, and b)how to design one that actually loads quickly and rank at Search engines.
Well good for you – we are going to tackle it all for you right now. Since over 43% of all sites on the internet WordPress runs (that’s going to be many) these are decisions we have a real say in that impact visitors experience as well as the choice search engine’s made in deciding whether or not to feature us prominently. Let’s take our time and address some basics plus some of those vital WordPress distinctions between amatures and the seasoned pros.
Pages vs. Posts: The Distinction Nobody Explains Well
Before you dive in and start building, it might be beneficial to clarify precisely what you are building. WordPress essentially uses two content types, and one of the most frequent mistake for new WP users will confuse one for the other.
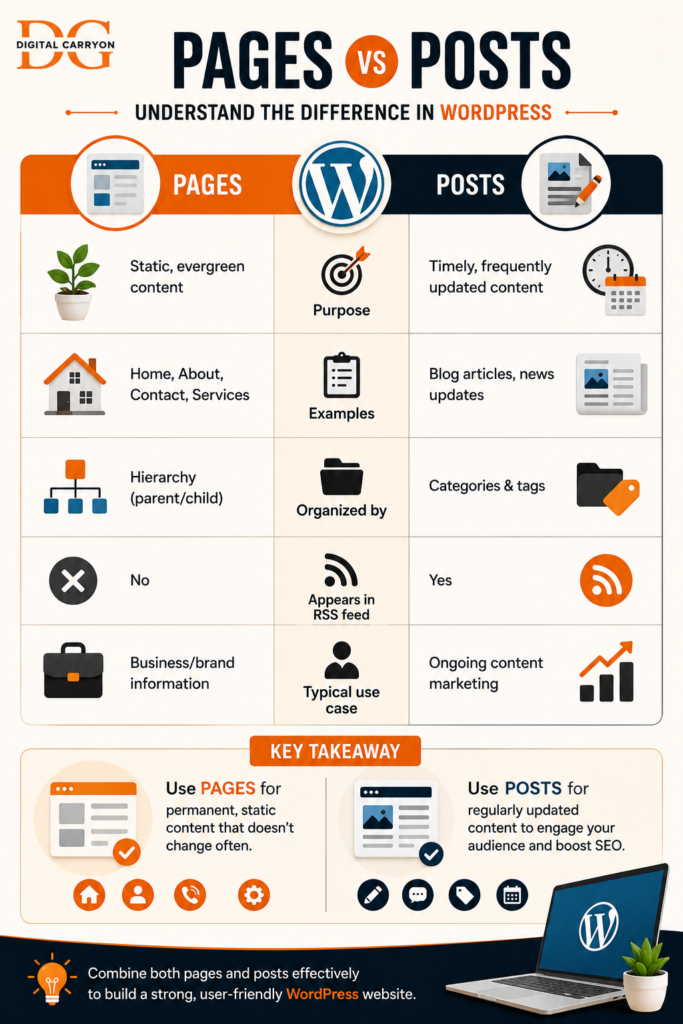
Another easy way to understand the page versus post concept is like this: your “About Us” page is going to look about the same in six months.A blog post announcing a product launch is likely not going to change much. The key takeaway is this: if your content is more or less a permanent piece of your web structure, it belongs on a page. If it’s of value in this moment, but may change, it should be on a post.
Step-by-Step: How to Create a Page in WordPress
There’s more than one way to get here, so let’s cover the fastest and most reliable path first.
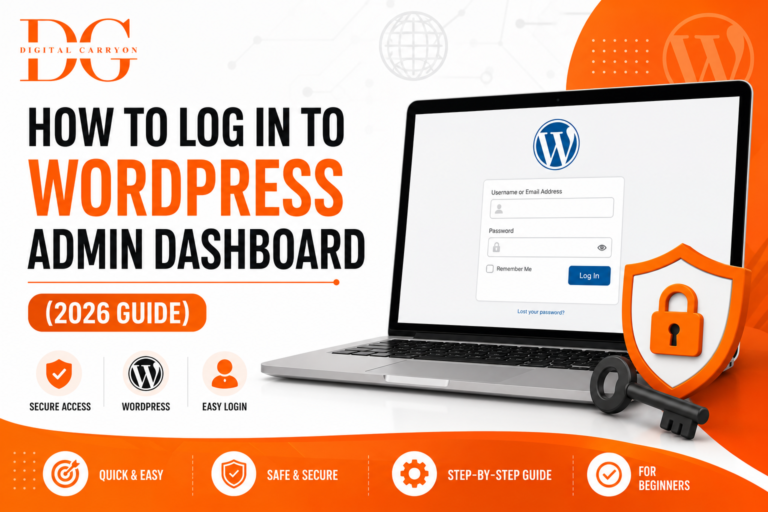
1. Log In to Your WordPress Dashboard
Go to yourdomain.com/wp-admin and enter your administrator and or editor credentials. Most new hosting customers (Bluehost, SiteGround, WP Engine) allow you to reach this panel via a one-click dashboard shortcut from the control panel.
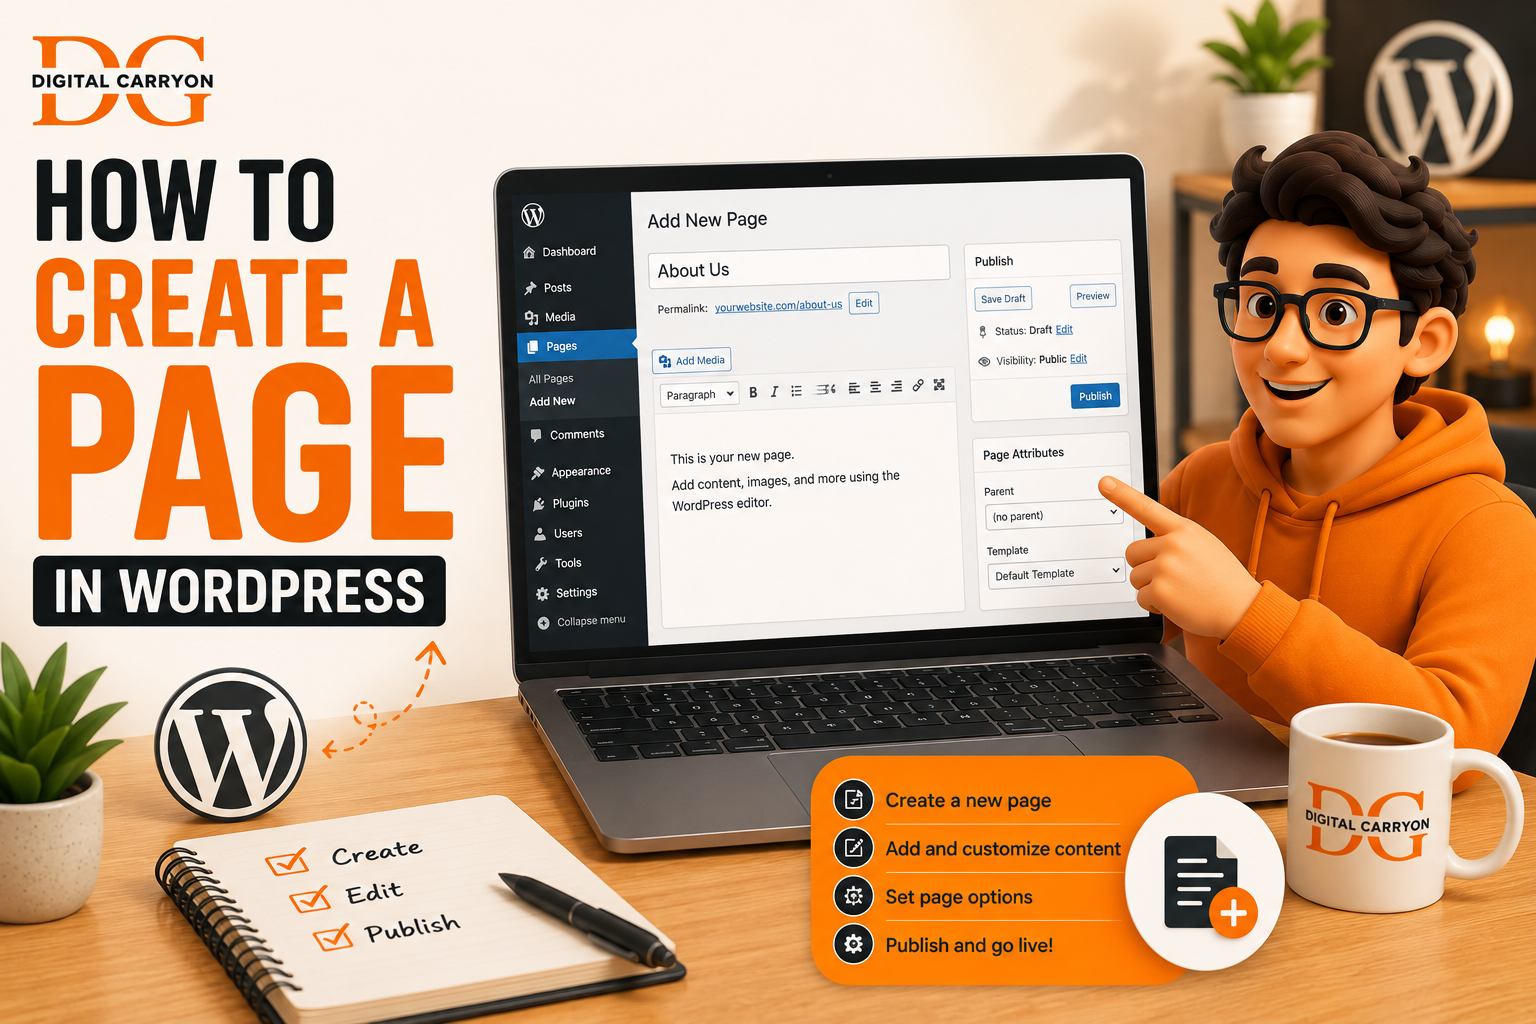
2. Choose Pages Add New
In the left-hand sidebar, hover over “Pages” and then click “Add New Page“. WordPress also provides a keyboard shortcut for this: all pages of the dashboard will have a black administration menu at the top of the screen, where one click to the dropdown “New” option will give you access to “Page”.
3. Give Your Page a Title
Click the “Add title” field and type something clear and descriptive. This title becomes:
- The default H1 heading on the page
- Part of your page’s URL slug
- A ranking factor for search engines
Skip the cleverness here. “Our Story” might sound charming, but “About [Your Business Name]” tells both visitors and Google exactly what they’re getting.
4. Build Your Content With the Block Editor
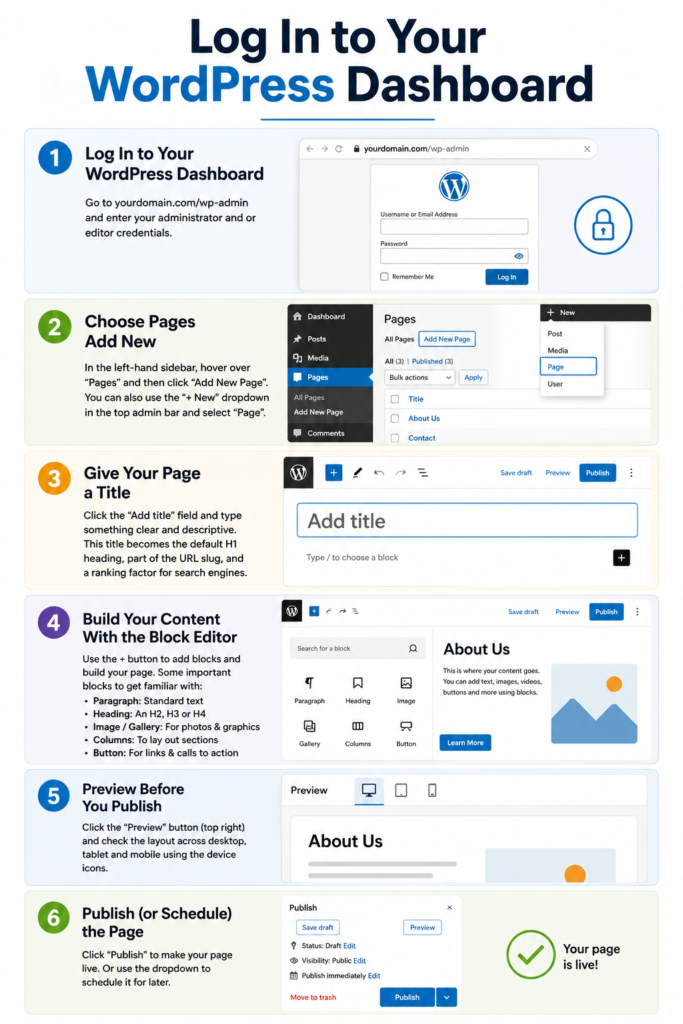
This will be where the majority of your time is spent. The default WordPress editor, called Gutenberg (released with WordPress 5.0), sees every part of your page as a ‘block’-a paragraph, an image, a button, a video embed, a pricing table, etc.
To add a block, hit the + button (either inline, or at the top of the screen), search for what you need, and add it. Five important early-on blocks to get familiar with:
* Paragraph: Standard text
* Heading: An H2, H3 or H4 to break your page up
* Image/Gallery: For photographs and graphics
* Columns: To lay out multi-column sections without having to know code
* Button: For links, calls to action like ‘Get a Quote’ or ‘Book Now’
If you’ve used a tool like Canva or a slide presentation program before, this drag-and-drop interface will become intuitive within minutes.
5. Preview Before You Publish
When you’re done building your page, press the ‘Preview’ button (top right) and check the layout across desktop, tablet and mobile (you can flip between the three). Roughly 80% of your page layout issues will be uncovered at this step before any visitor sees it!
6. Publish (or Schedule) the Page
Here’s the final step. When ready, in the Publish section, click the blue Publish button and, confirm it on the pop-up, the sticky comment is live. Want to wait? Instead of clicking “publish”, click the Immediately link next to it and choose a new date/time – convenient for a planned launch.
The Settings People Skip (and Regret Skipping)
Publishing is easy. It’s the options hidden in the right sidebar that will make or break your page over the long run.
Page Attributes: Parent Pages and Templates
Under Page Attributes, you’ll find:
- Parent – allows you to group web pages together (for instance, “Web Design” and “SEO Audits” are parented under “Services”). This will result in having the URL address reflecting a logical structure such as yoursite.com/services/web-design.
- Template – if your theme has it, opt for different layouts such as “Full Width” or “No Sidebar” (landing page).
- Order – sort order of pages in menus when sorting manually.
The Permalink (Your Page’s URL).
Edit and refine just below the URL preview, next to your title. Make it short, all lowercase and relevant to your keywords- /wordpress-page-guide beats /post-copy-final-v2 every time. Good clean URLs tend to contribute to better usability and the engines have added them to their interpretation of page relevance (Google’s own SEO documentation).
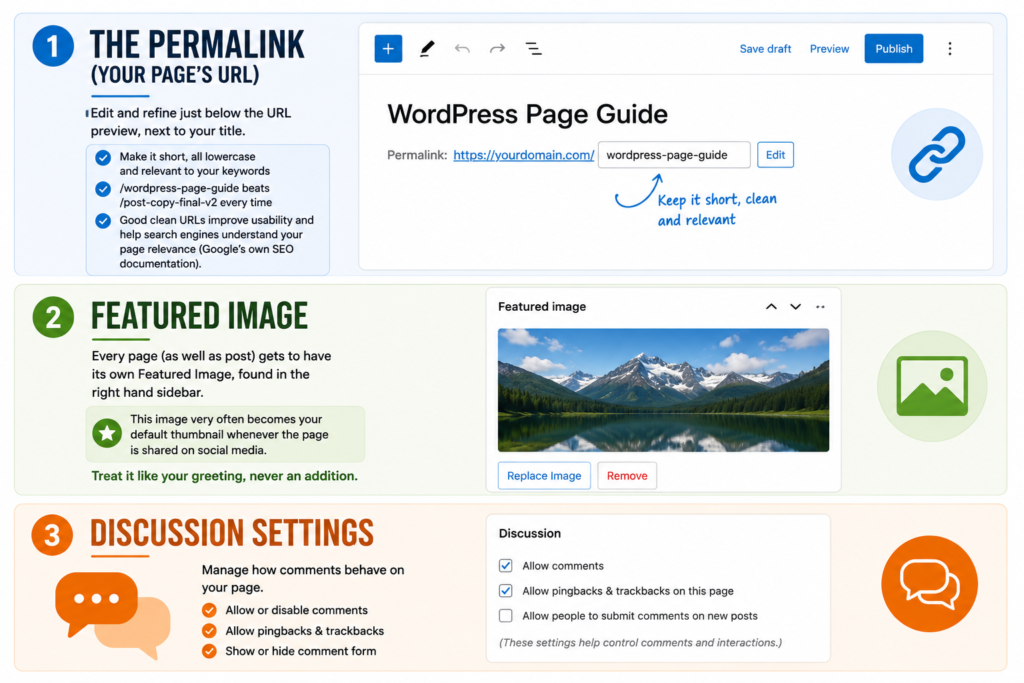
Featured Image
Featured Image Every page (as well as post) gets to have its own Featured Image, found in the right hand-hand sidebar. This image very often becomes your default thumbnail whenever the post or page is shared on social media. Treat it like your greeting, never an addition.
Discussion Settings
Discussion Setting On default WordPress will often allow a comment to appear on every page.
For any that, as example, your Contact page or Privacy Page, deselect enable comments in the Discussion tab-no need for your Customers to engage in any arguments with one another in terms of your returns plan. SEO The SEO will make your page easier to find Creating the page is just the beginning. What would be so helpful for people to discover that on line in the beginning. When you insert of the plugins called Yoast SEO or Rate Rank at the end of your writer, you can see some box wherein you may kind a unique field on SEO Name, which does not necessarily fit what you’ve called it your own on-website (like H1 for more clicks, or Meta Name, which usually consists 150 to 160 characters that could be useful to the persons looking and for KeyWord.
This phrase is one who you’d choose your to position is found in the line.
- Naturally incorporate your focus keyword into the title, the first 100 words of the body content, and at least one heading – avoid shoehorning it into every sentence.
- Include internal links to relevant pages on your site to allow visitors and search engines to navigate the structure of your website (e.g., linking your “Services” page from your homepage).
- Optimize your images with descriptive alt text and use compressed image files – this is known to influence ranking factors by reducing page load time.
- Use a hierarchical structure for headings. You need to have only one H1 (title of the page) followed by an H2, H3 etc. Do not skip levels in the heading structure, because this is disturbing for readers and users with screen readers.
Mistakes that I Have Seen (Including Mistakes I Have Made)
After building more pages than I can count, a few mistakes show up again and again:
After creating more web pages than I can easily count over the years, there are a couple of mistakes that have recurred:
Leaving the default “Sample Page” published on your live website. WordPress has a default page installed when you run it by default that may be easily forgotten, and it is obvious to visitors in search engines, thereby appearing amateurish.
Publishing a web page without reviewing its permalink. Auto-generated slug- URLs can lead to keyword-strewn, messy URLs.
Remembering to add the new web page to your navigation. You must manually add the web page to your navigation under Appearance Menus to have it displayed to viewers.
Not previewing on a mobile. More than 59% of all traffic on the web is generated by mobile devices – an error on your 27-inch monitor could ruin the web page entirely on a smartphone.
Pages vs. Landing Pages: A Quick Clarification
The short answer is, nothing really. A landing page is just another WordPress page (or sometimes a post) that has been specifically built to convert users towards a single call-to-action, and often employs a “landing page” page template to remove your theme’s header, navigation and footer to make you as distraction-free as possible (many page builders, and indeed some themes, have a built-in “Landing Page” page template for just this reason).
Standard Page Landing Page Your Page Includes site navigation, header and footer Often stripped of navigation elements to reduce user attention Spam, virus alerts, etc often included Spam, virus alerts, etc, often removed Multi-purpose (e.g.
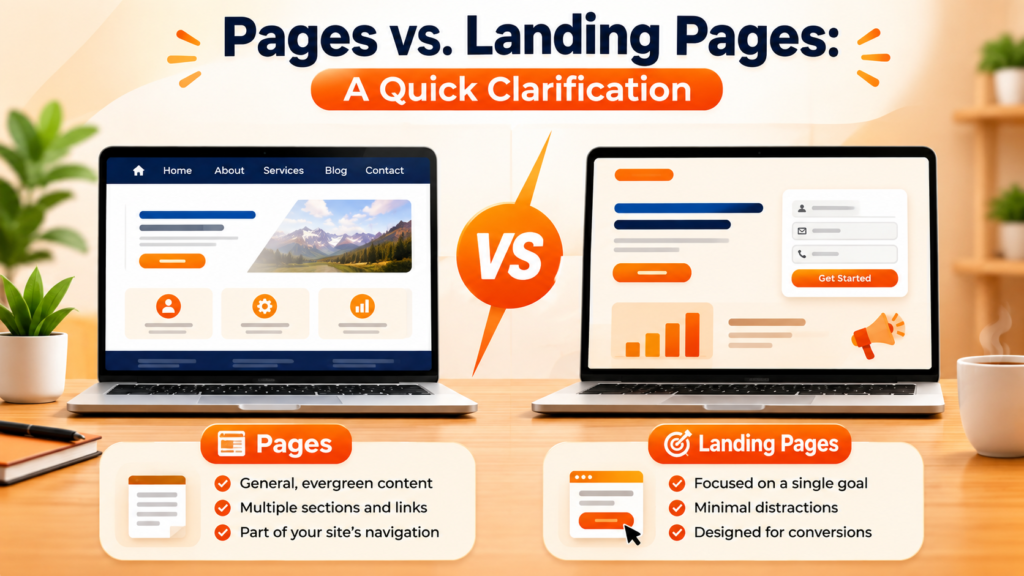
Informational page) Focused call-to-action Used on the main navigation Menu often linked from ads, email etc. How To Create Page With a Page Builder There will be times, however, when Gutenberg simply does not give you the design flexibility and control that you require, at such times there are various plugins such as Elementor, Divi Builder or Beaver Builder that will provide you with a drag-and-drop style page builder that allows you to add animations, margins, Padding, etc, at the page level! Honestly speaking, for most ordinary pages of a business, such as an About or Contact page, or an individual product page, the built-in editor provides enough of everything you could possibly need. Landing pages, especially ones built for lead generation or sales, will often call for more sophisticated layout tools and designer input that goes beyond the out-of-the-box offerings in Gutenberg.
Page Creation Cheat Sheet Here’s a quick checklist to get through each time you create a new WordPress page: – Title clear, descriptive and containing your primary keyword? – headings(h2 and h3) for structure and clarity? – URL slug short, concise, and contains your keyword? – Featured image added and optimised for performance? – Meta Description (150-160 characters)? – Preveiw page on both desktop and mobile devices? – Page added to correct menu (navigation)? – comments disabled on non essential pages? – added some internal links pointing to other pages or posts within your site?
To Summarise Creating an WordPress page is an essential skill, and surprisingly straightforward with this easy-to-follow guide. It’s what you do both around the ‘Add New Page’ button – structuring your content effectively, implementing search-engine-optimization techniques, and crafting compelling visuals that build credibility and drive conversions-that sets ordinary pages apart from those that become lead-generating assets. Keep practicing and each subsequent page will feel more intuitive than the last.
So, if you’re ready to take action, head over to your WordPress Dashboard now and create your first page using these steps from top to bottom. And hey, if you found this walkthrough helpful, let me know in the comments what page you’re creating, and don’t be afraid to share it with someone you know who might be a little daunted by this process!